Viewer
1. In ManageArtworks, can I view files without downloading them?
Yes, you can view the files without downloading them. There are three ways the user can veiw the files without downloading them as follows:
1. Workflow - The User can view the files from the Workflow, the user needs to click on the Viewer icon as shown below.
 2. Dashboard - The User can view the files from the Dashboard, in form of Thumbnail view icon from all components.
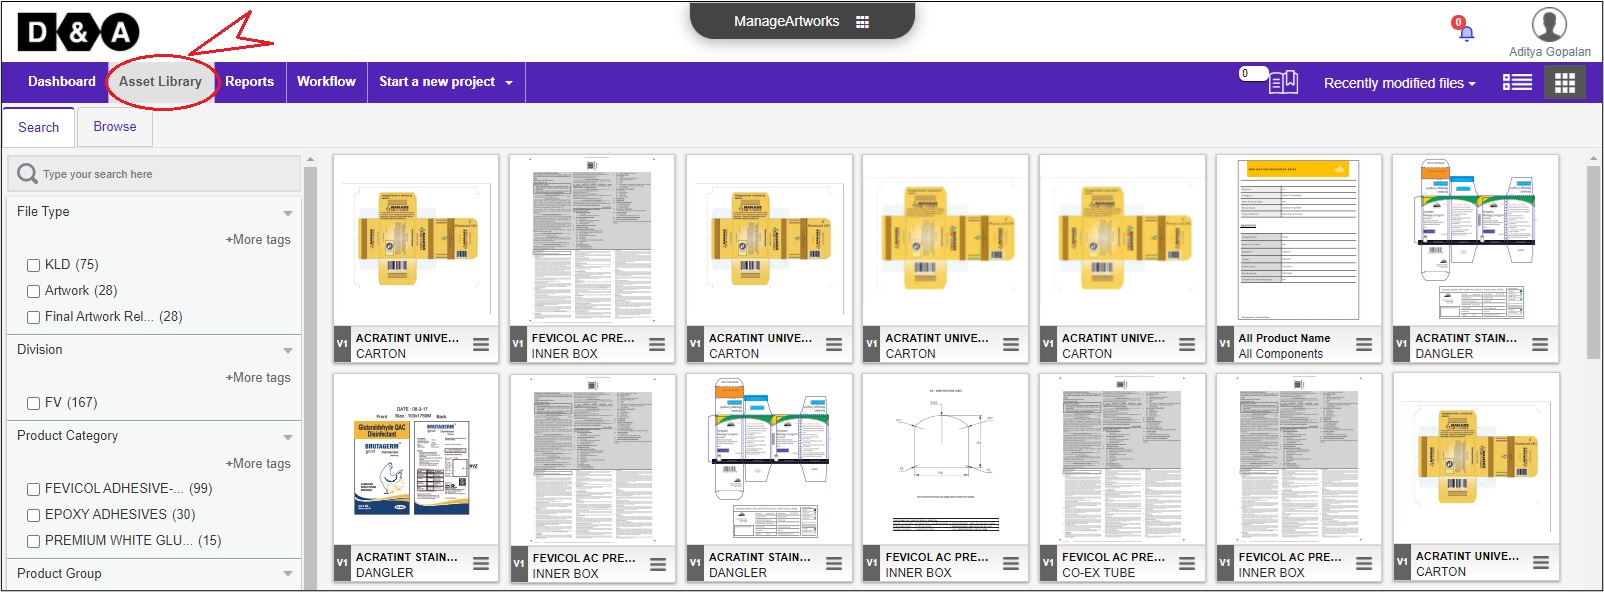
 3. Asset Library - The User can view the files from the Asset Library, in form of Thumbnail icon view.
 A Viewer is opened in a separate new tab as shown below.
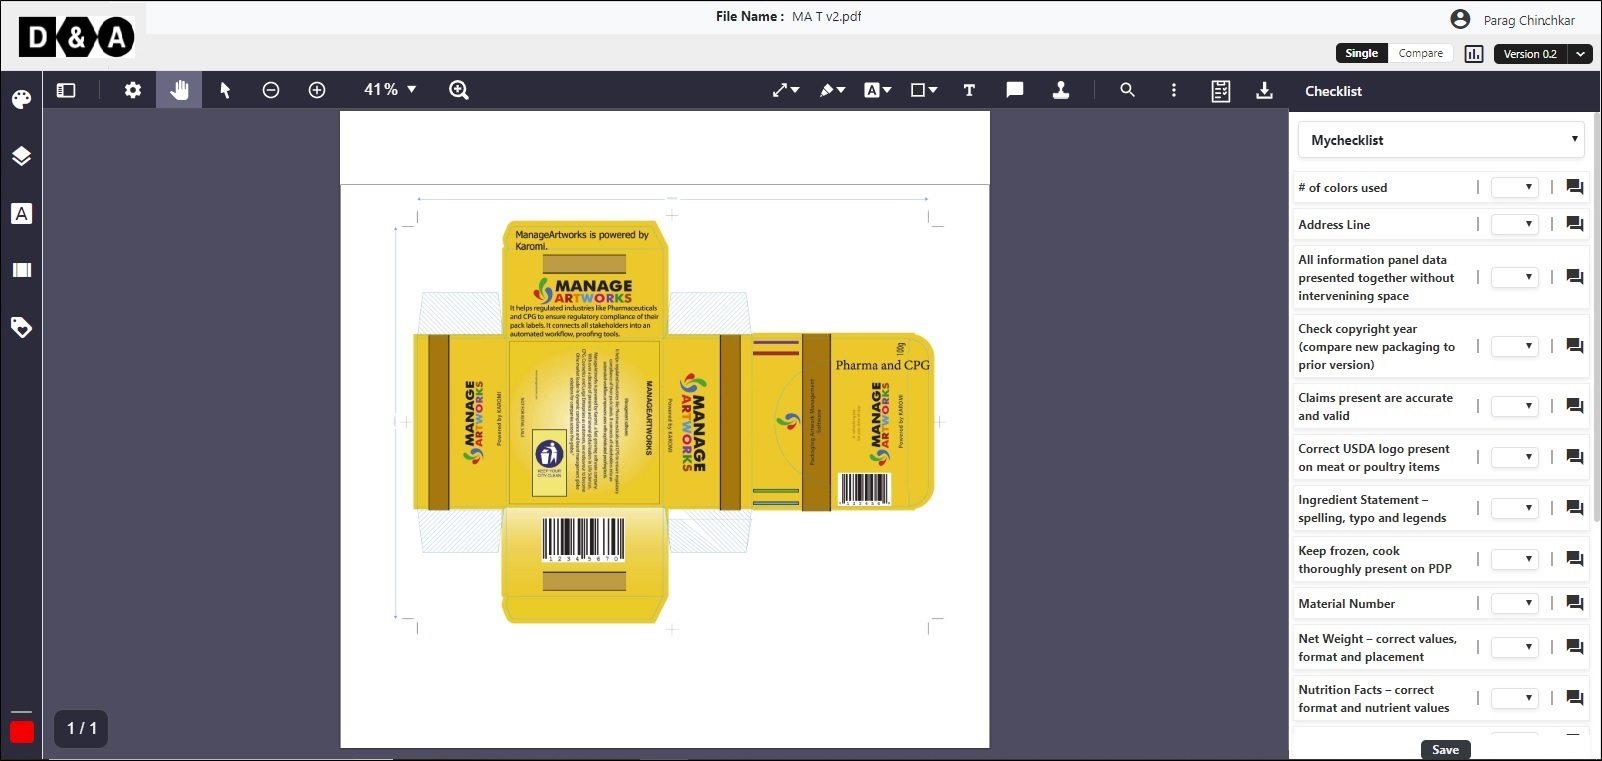
2. How do I launch the built-in viewer?
3. Can I see Viewer in Full Screen mode?
Yes, you can see the viewer in full screen mode as shown below.
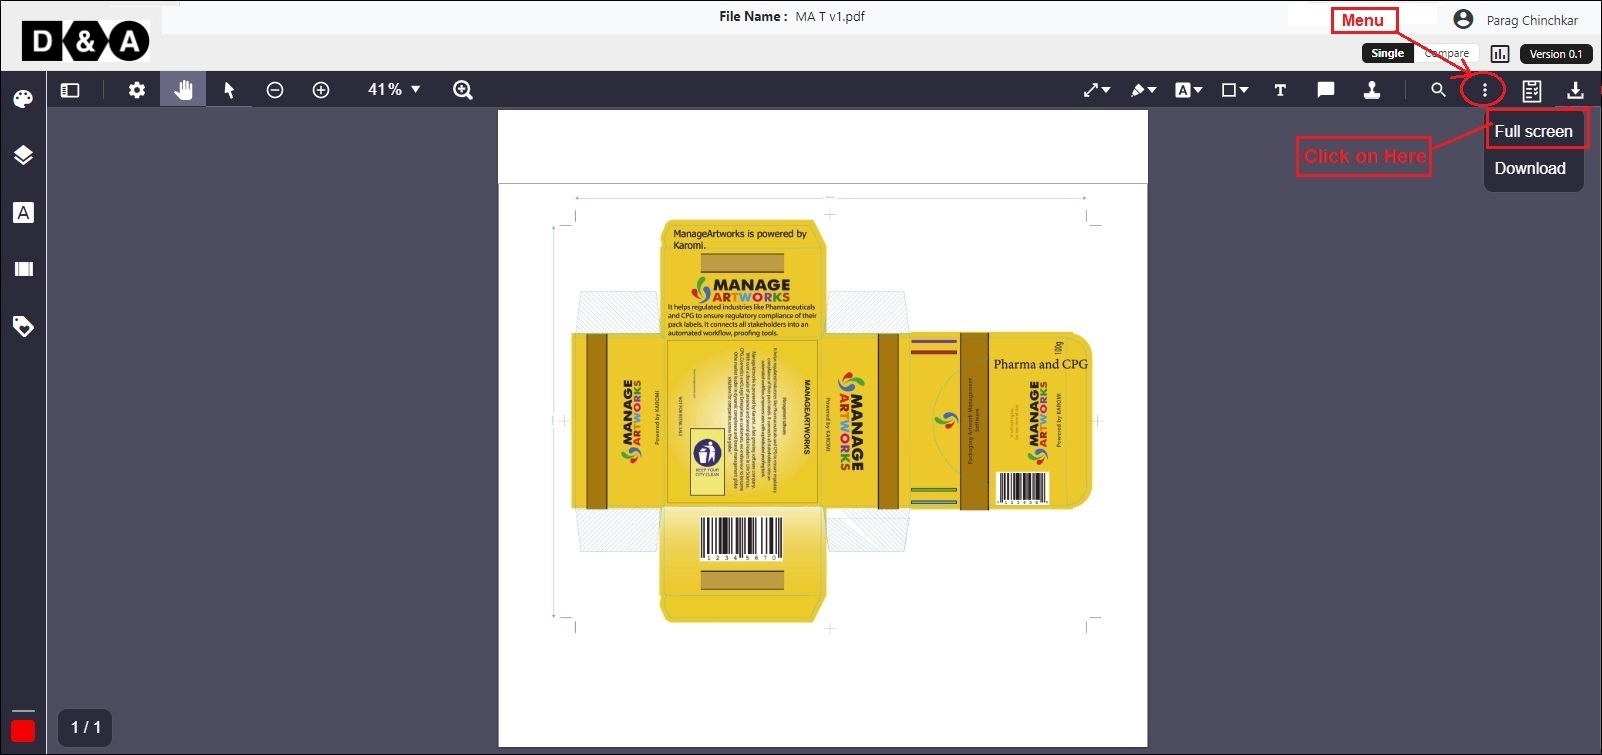
4. Can I download the file from the viewer?
Yes, you can download the file from the viewer as shown below.

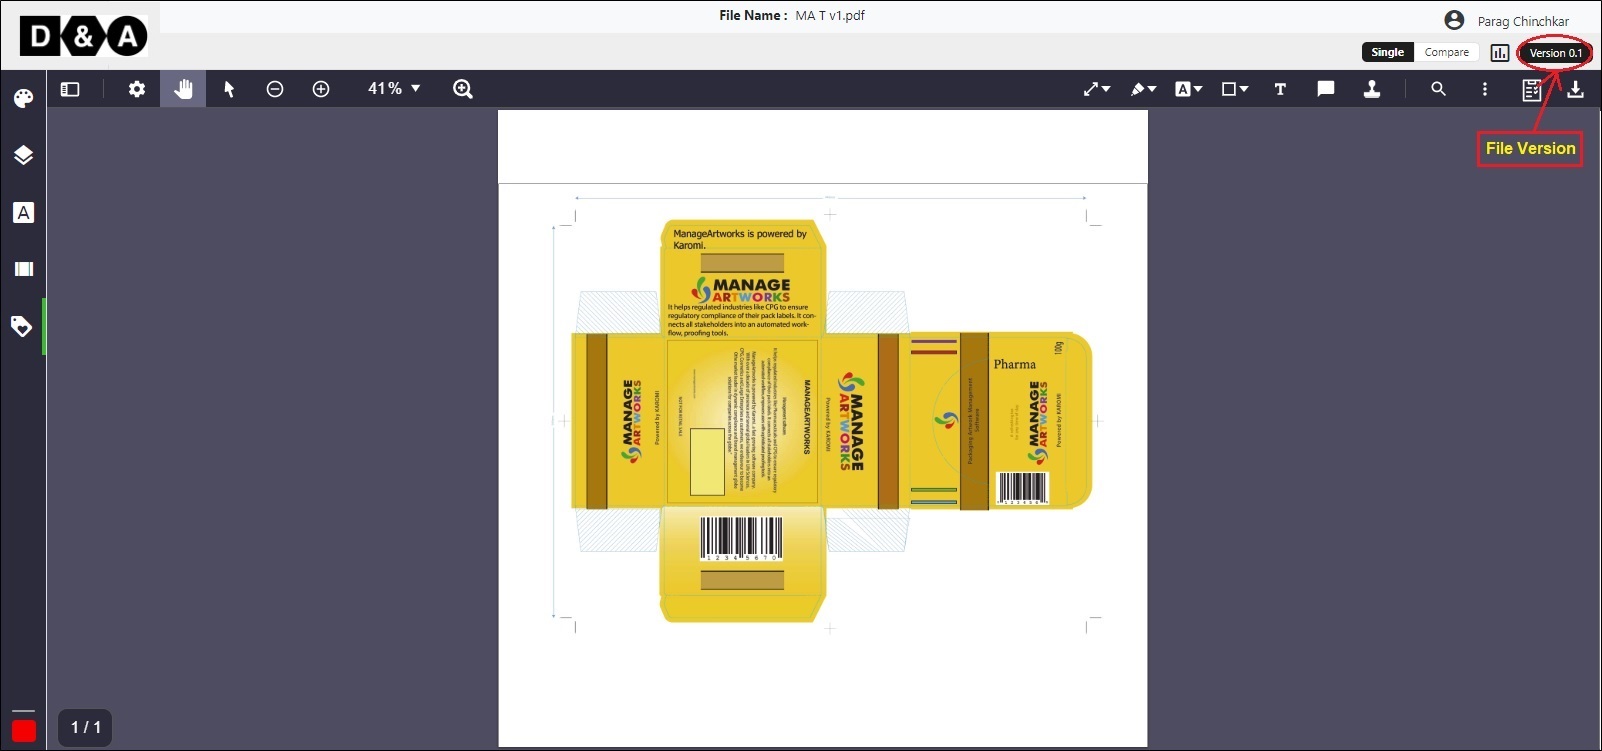
5. Will I see the version number of the file?
Yes, you can see the version number of the file as shown below.
6. Can I search for a keyword in the file?
Yes, you can search for a keyword in the file as shown below.

7. Can I zoom in or zoom out?
Yes, you can Zoom In or Zoom Out.

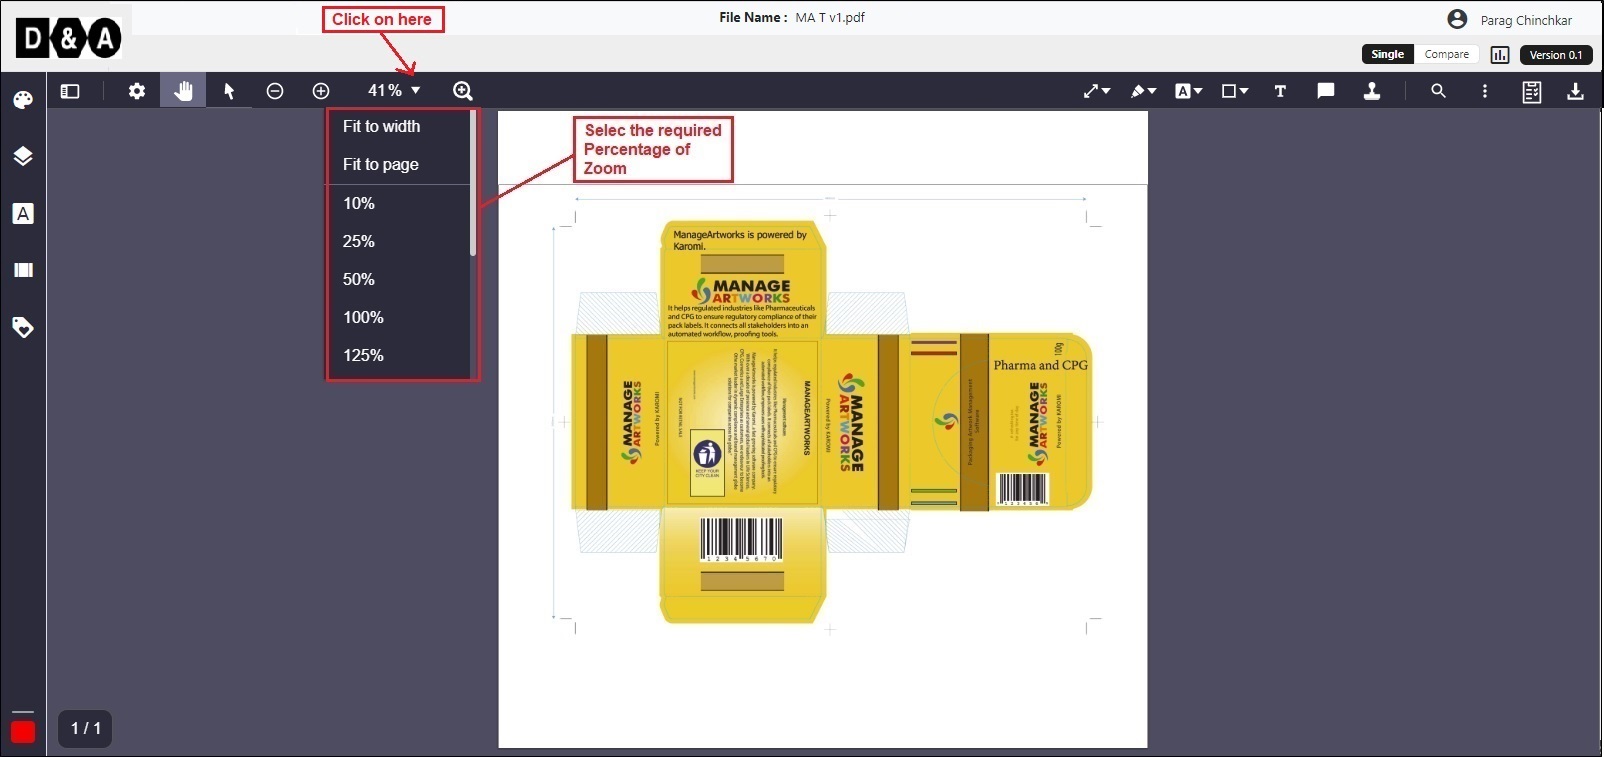
8. Can I set a particular percentage of zoom?
Yes, you can set a particular pecentage of zoom from the drop down
9. Will I be able to rotate clockwise and counter clockwise?
Yes, you can able to rotate Clockwise and Counter Clockwise. Goto Viewer-> Click on View Controls-> Click on Rotate as shown below.

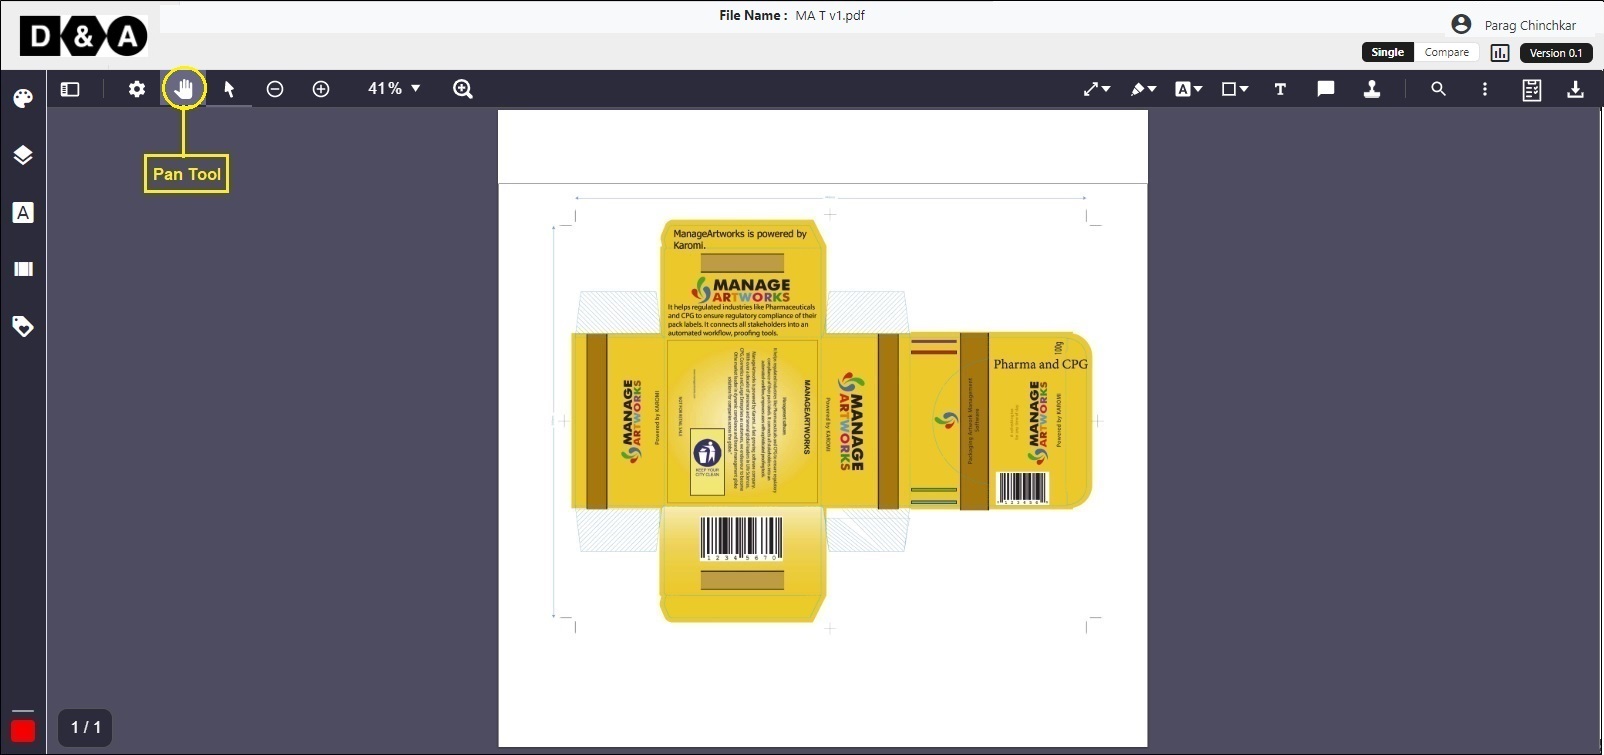
10. What is the purpose of the Hand/Pan tool?
The purpose of the Hand/Pan tool is to hold and drag a file in the viewer.
11. What are the tools I see in the sidebar of the viewer?
In the viewer you can see sidebar tools like:

- Color - Displays colours in the artwork. Spot and process colours are classified separately.
- Layer - Displays layers in the artwork. Layers are classified as Visible and Hidden Layers.
- Fonts - Displays fonts in the artwork with font size in mm, font name and letters using that font in the art-work.
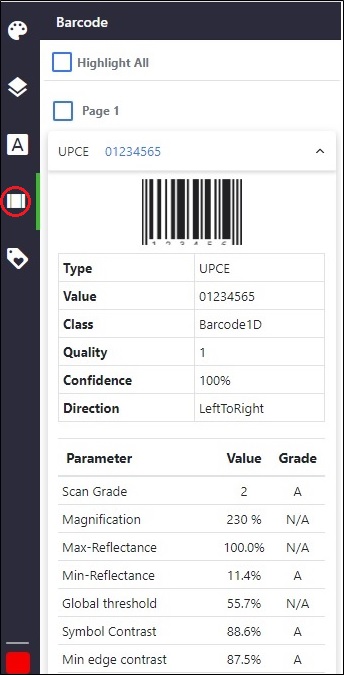
- Barcode - Displays information about bar-code on the PDF file, if any.
- Meta data - Displays metadata of the associated file.
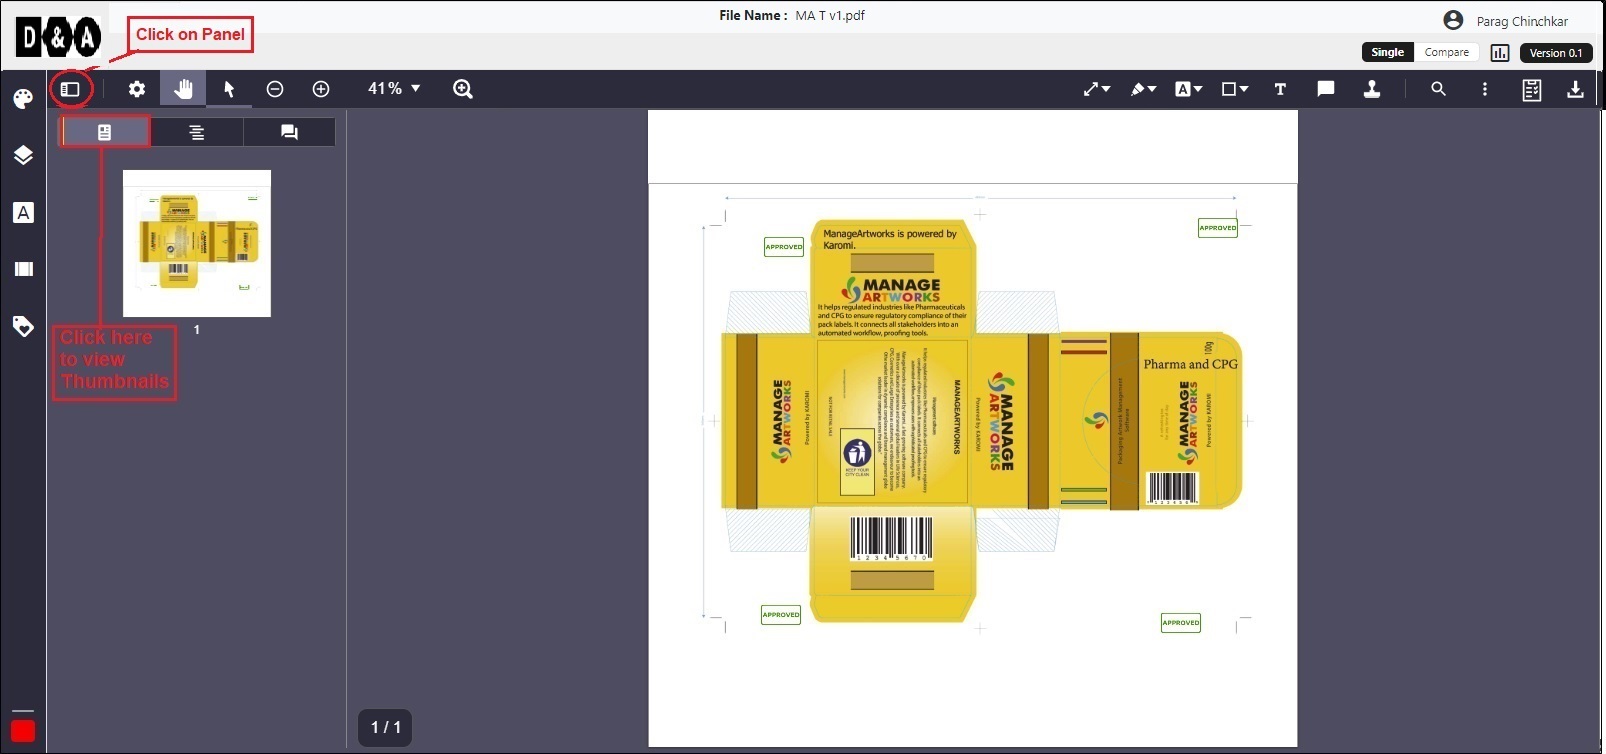
12. Can I see thumbnails of the different pages in the file?
No, you cannot see thumbnails of the different pages in the file. You can see only first page thumbnail of the file
13. Will I be able to separate and see the colours in the file?
Yes, you can separate and see the colours in the file. Click on the respective color icon in the sidetool bar and it will show the respective color on the file based on the selection of the color.

14. What do I do to see where a particular colour is used in the file?
Goto the Viewer->Click on Color, list of colors will be displayed and select required color by ticking the check box. After selecting the color, the only color will be displayed in the viewer as shown below.
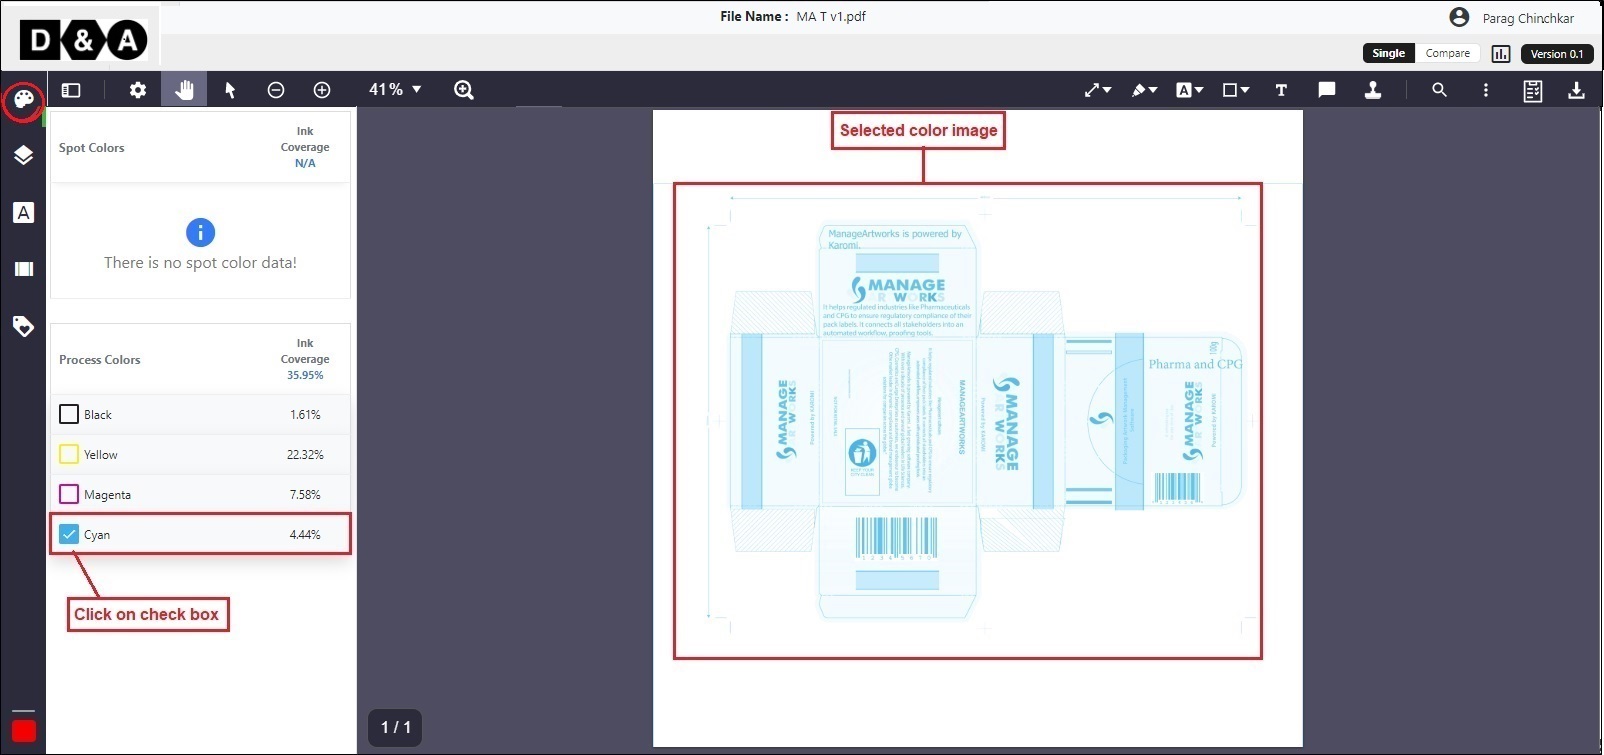 Note: System will automatically detects and highlights the color separation Ink percentage.
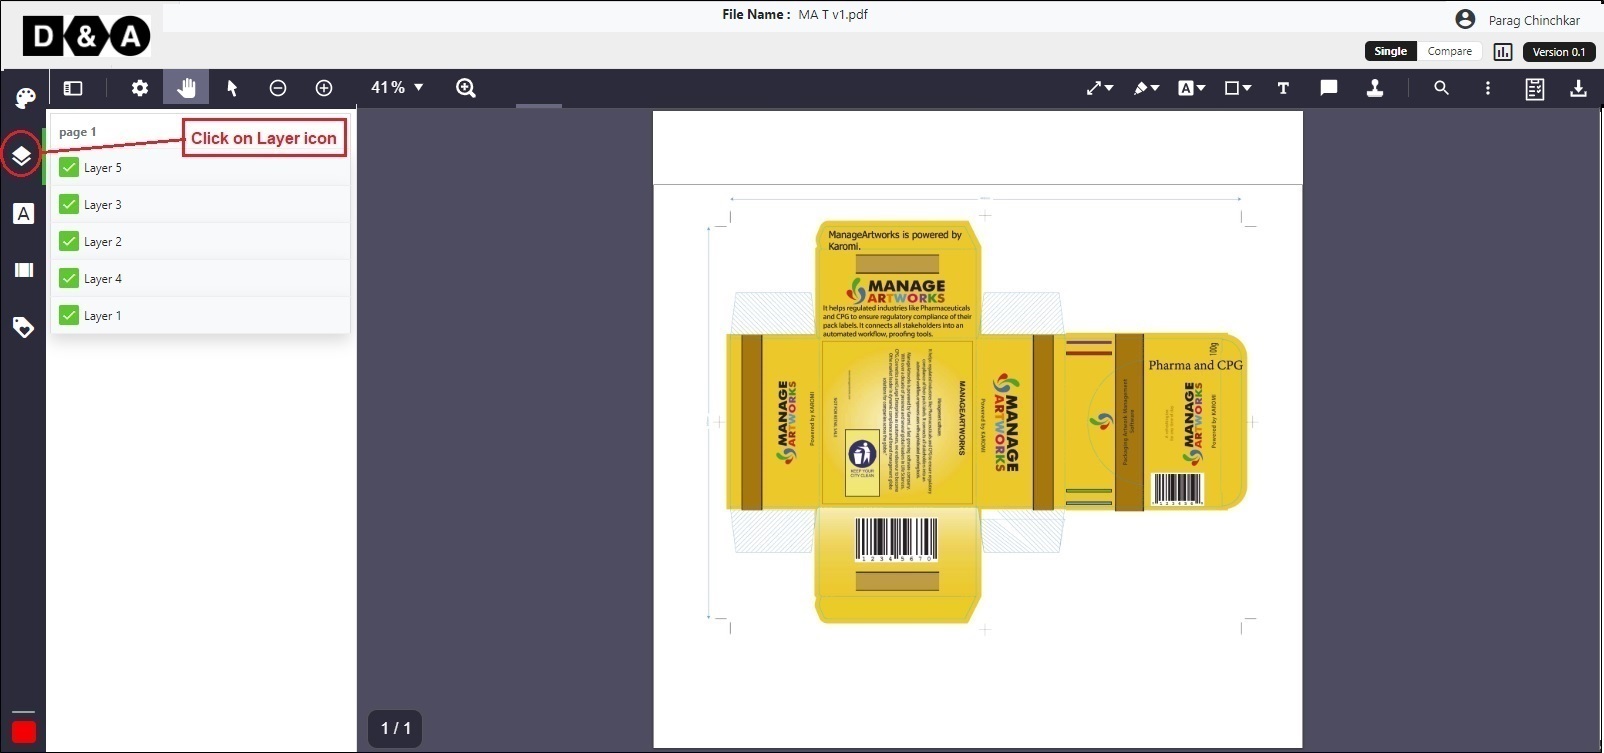
15. Can I see the layers?
Yes, you can see the layers. Click on the respective layer icon in the viewer and select the required layer by ticking the check box, it will show the respective selected layer of that file in the viewer, based on the user selection all the layers can be viewed separately if available in the artwork. Refer the image shown below.
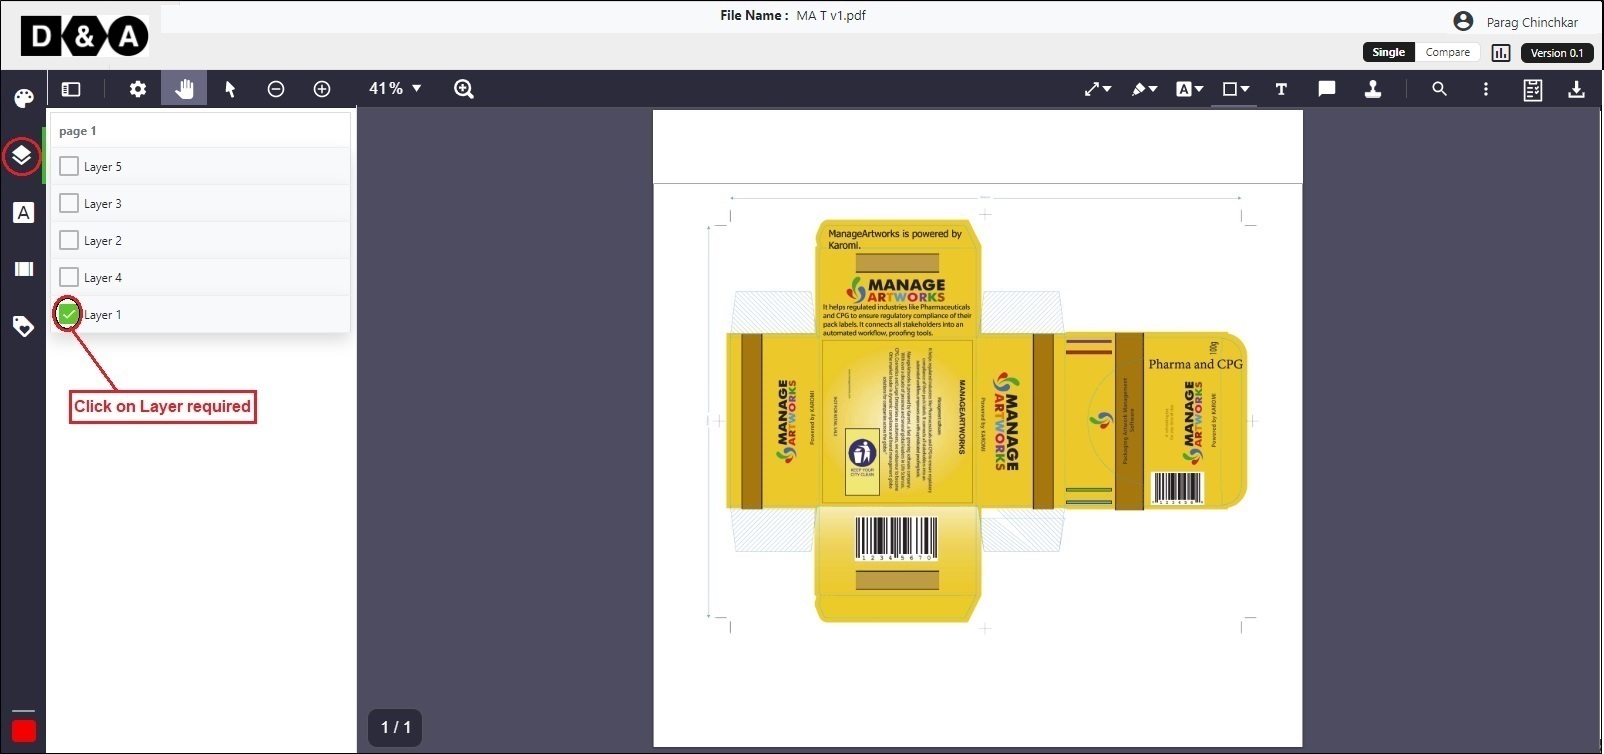
16. How do I see each layer separately?
Click on the respective layer icon in the viewer and select the required layer, it will show the respective selected layer of that file separately in the viewer only.
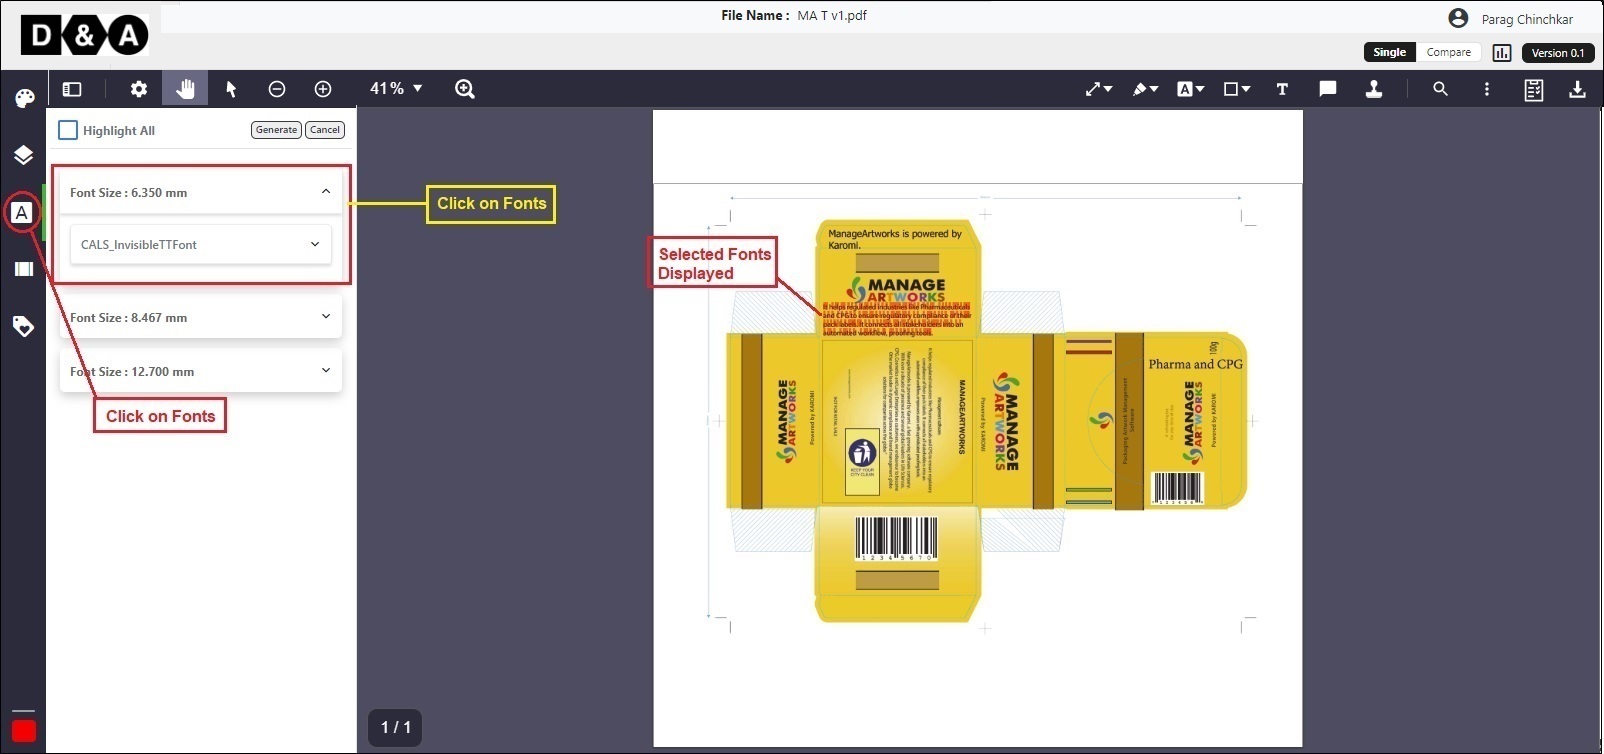
17. Will the system identify the fonts used in the file?
Yes, system identifies the Fonts used in the file. Click on the Fonts Tool icon to view the fonts as shown below.
18. Are font name and font sizes displayed?
Yes, Font name and Font sizes displayed. Click on the Fonts Icon to view the font name and sizes of the file as shown below
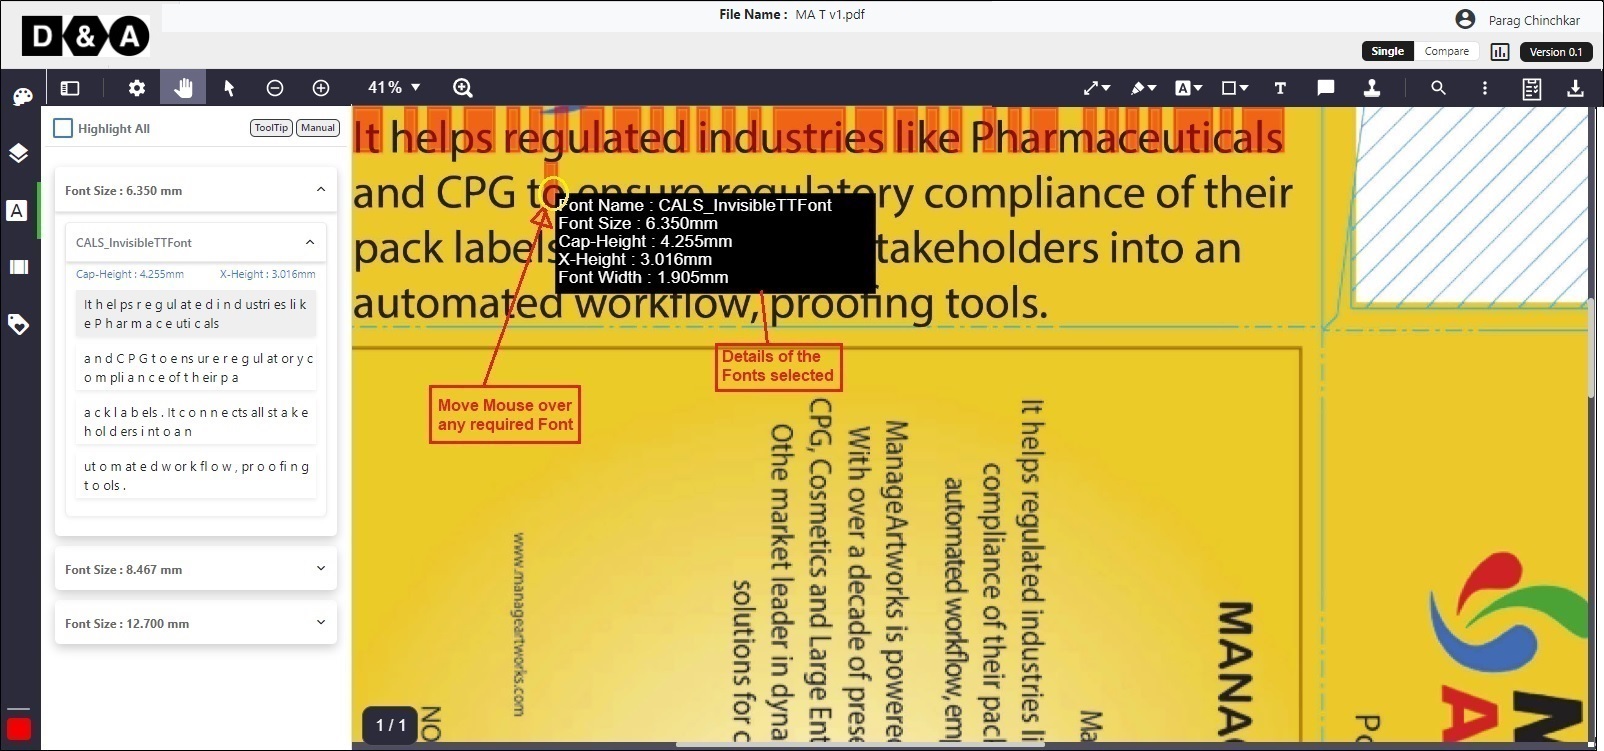
19. Will I be able to calculate the x-height and cap-height?
Yes, you can calculate the x-height and cap-height. Click on the Fonts Icon and click on the required fonts name to calculate the x-height and cap-height of the file as shown below.

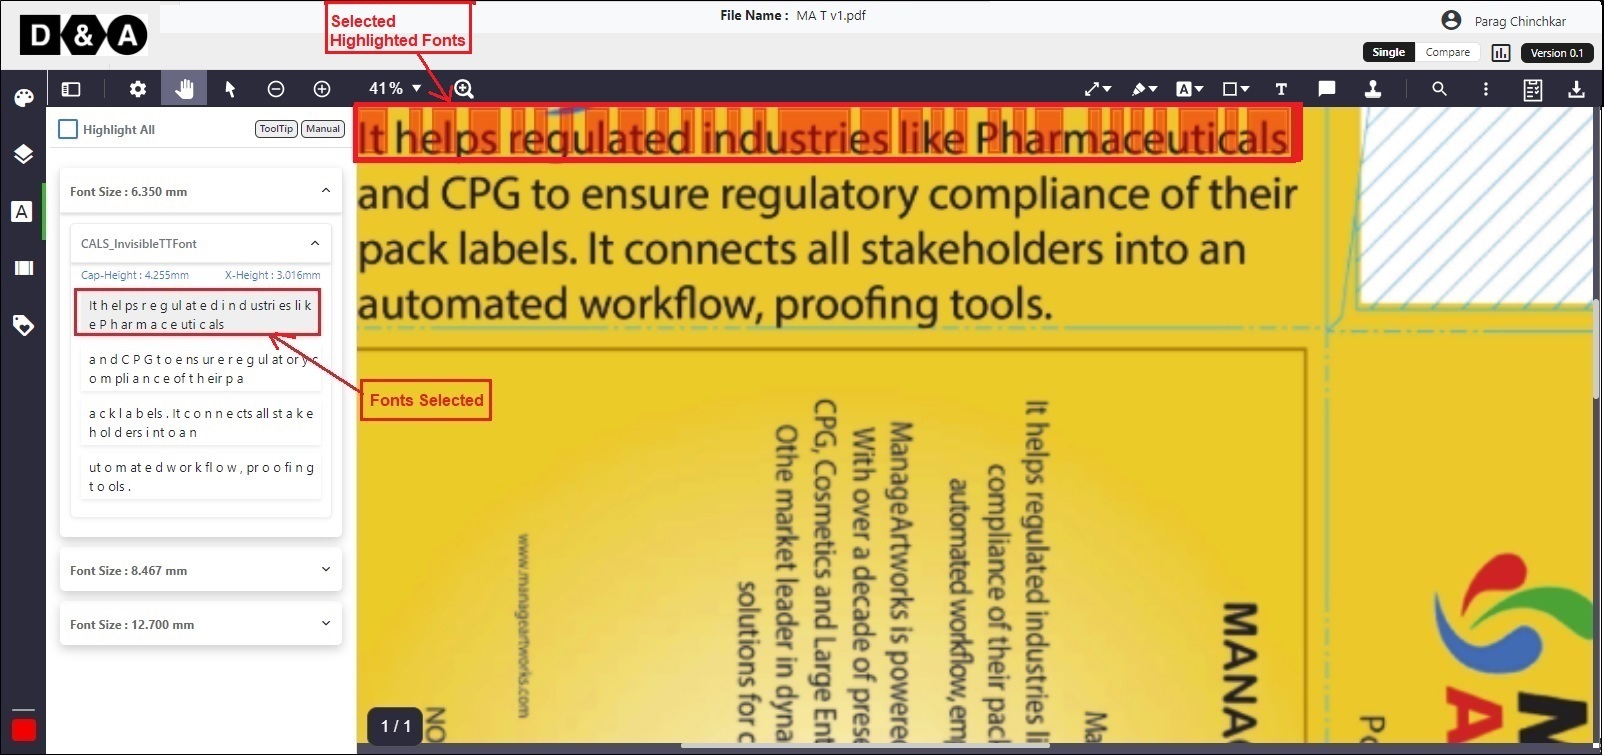
20. Is the text in the file highlighted if I choose a font displayed?
Yes, the text in the file is highlighted while choosing a font. Click on the Fonts Icon and click on the required font where the text in the file is highlighted as shown below.
21. Can I set a highlight colour of my choice?
Yes, you can see the highlight colour of our choice. Click on the Colour Swatches icon and select the required color. After selecting the color, click on Ok to save changes. Refer the image shown below.

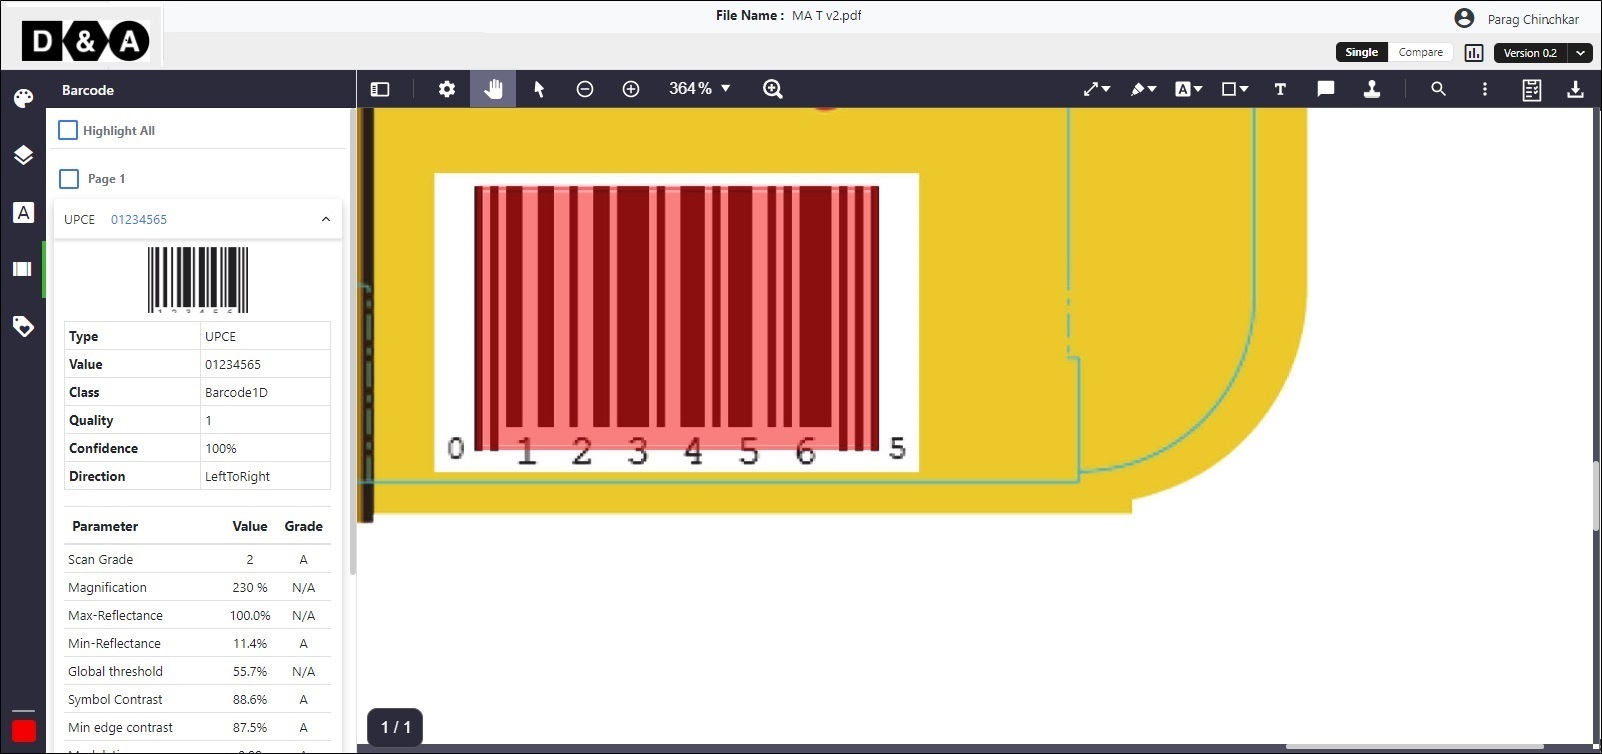
22. Can the system identify barcode?
Yes, the system can identify the barcode.
23. What details are extracted from the barcode?
The details like, Type, Value, Class, Quality, Confidence, Direction.
24. Can I compare two files within the viewer?
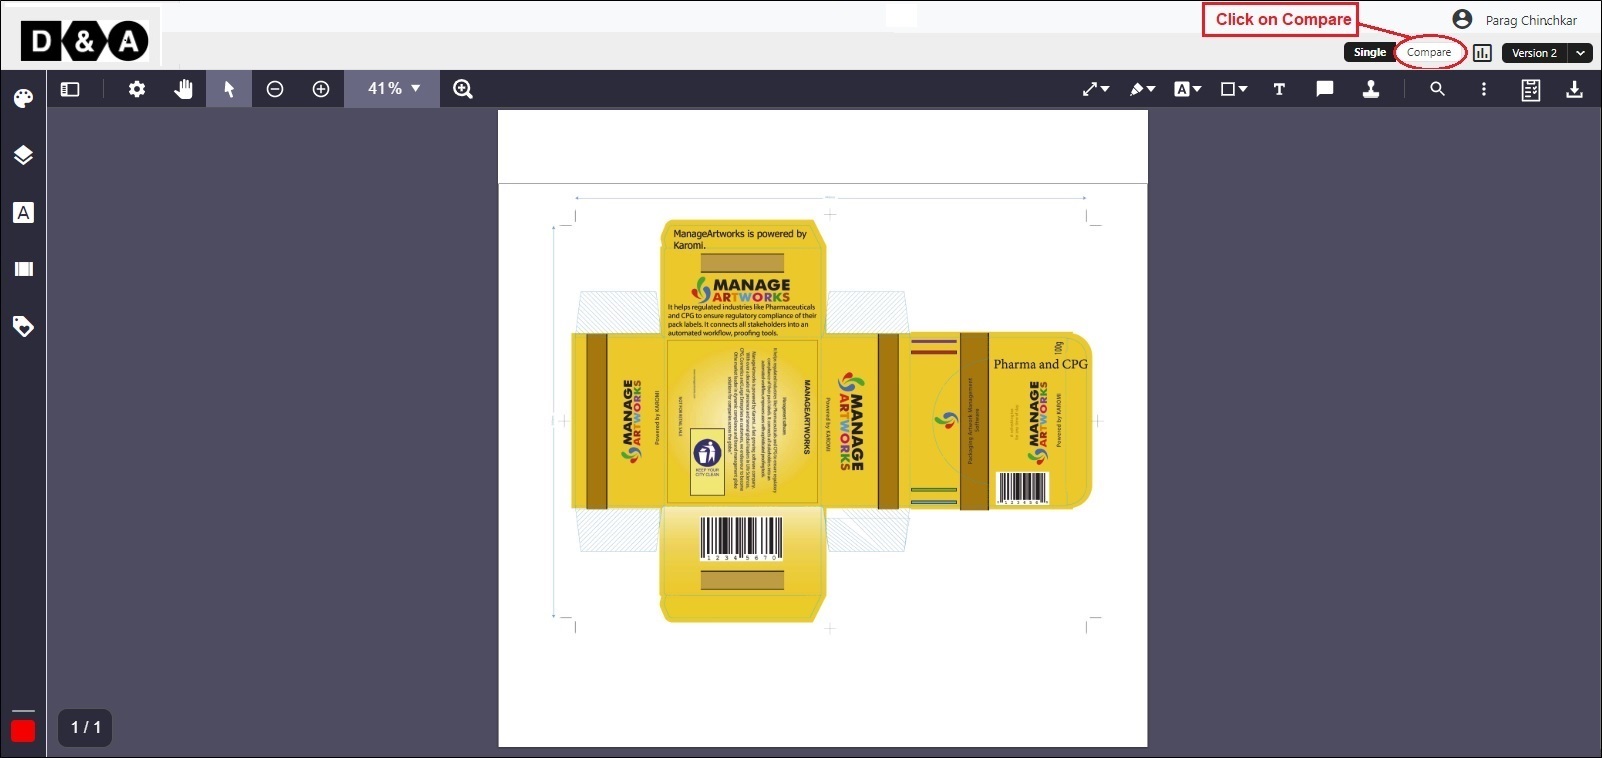
Yes, you can compare two files within the viewer.
25. How do I select the files to compare?
Image Compare tool which is available in the sidebar of Viewer, performs a pixel to pixel comparison between two PDF files.
- The source file is referred to as Master Digital File and the target file is referred to as Sample Digital File.
- If the user launches viewer from a Workflow or Asset Library, then that file becomes the Master Digital File.
- The files can be Another version of the file, Another file in library and Another file from desktop.
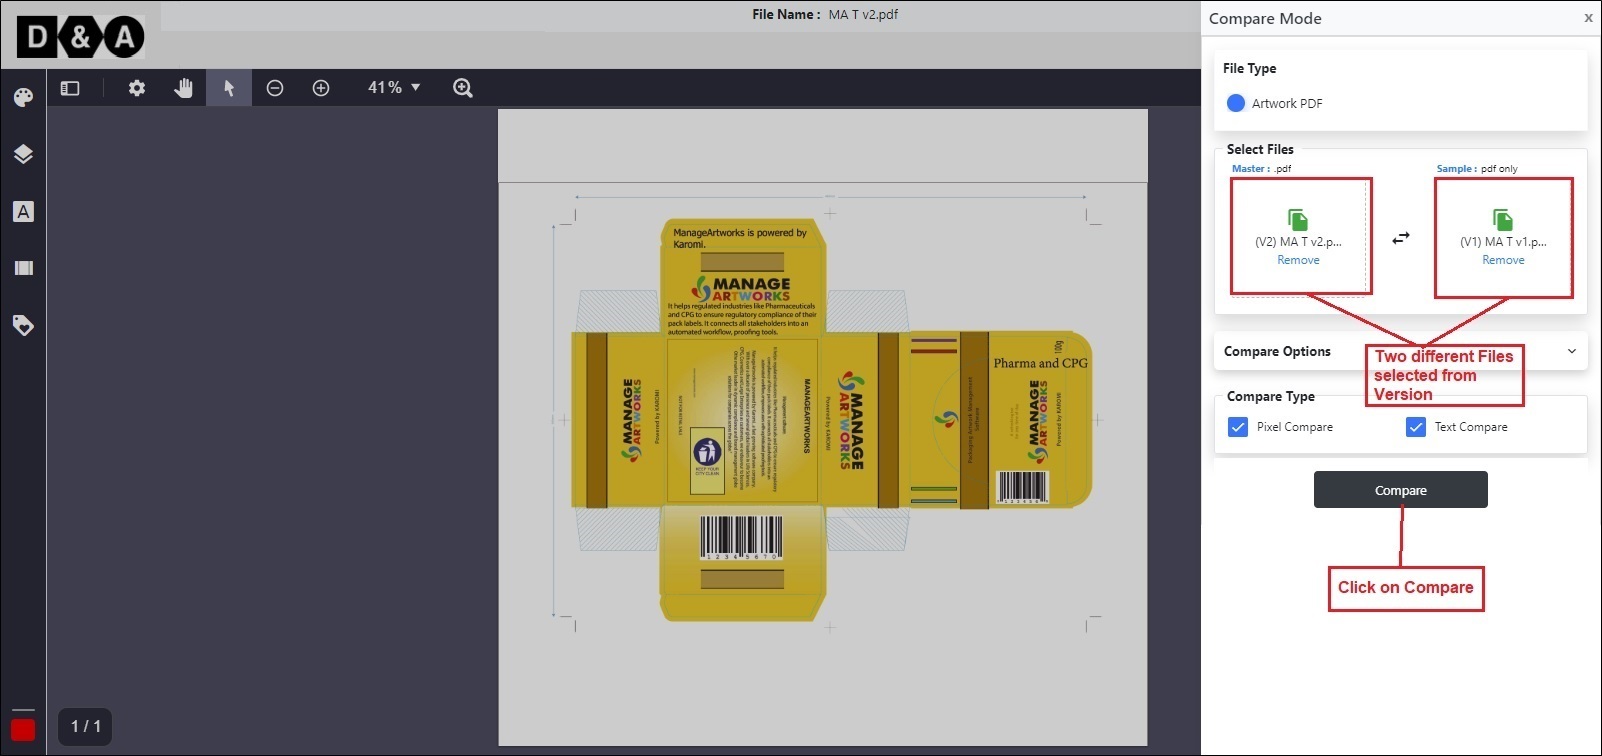
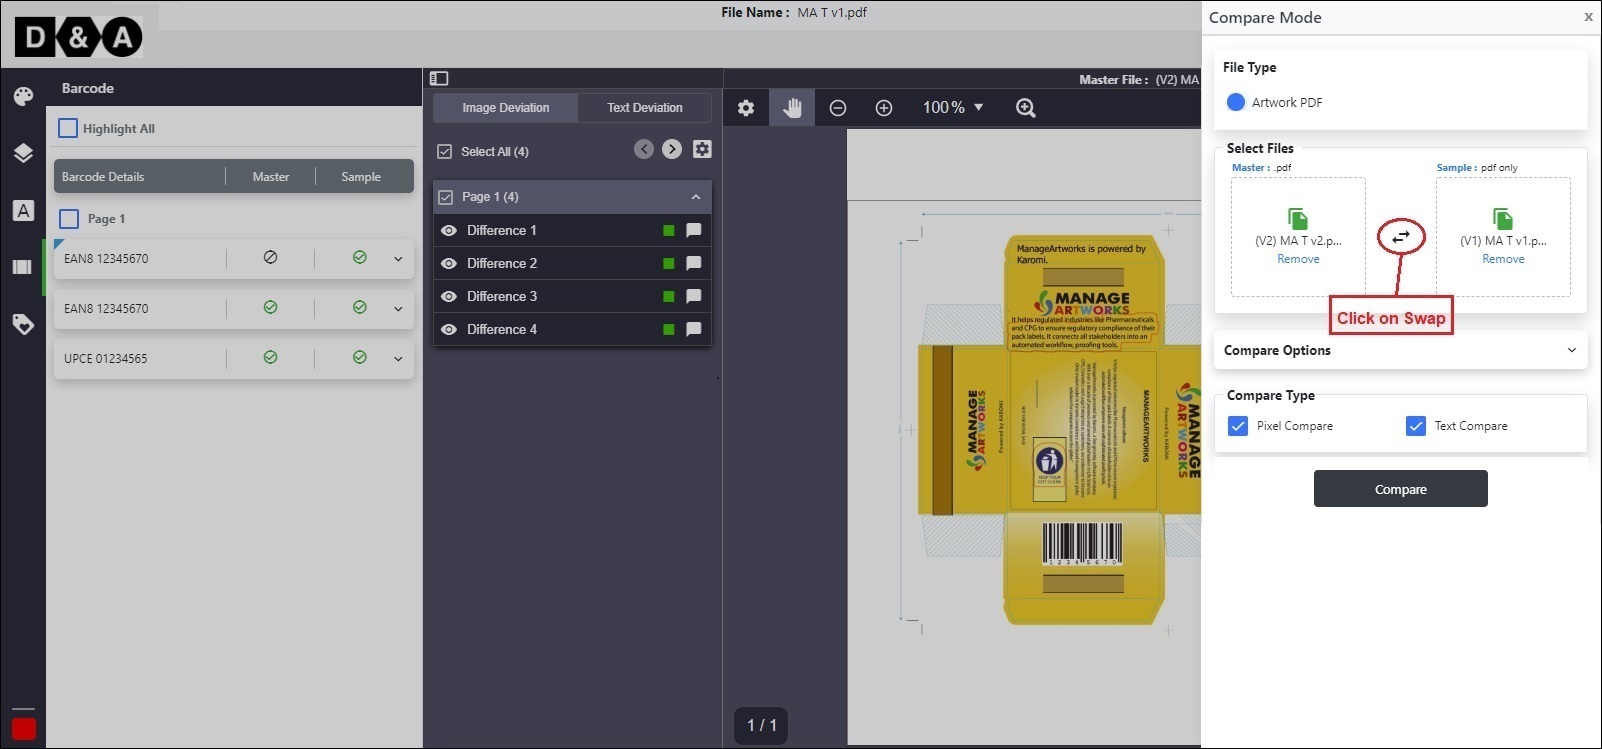
26. Can I swap the files I am comparing?
Yes, you can swap the comparing files by clicking the swap icon as shown below.
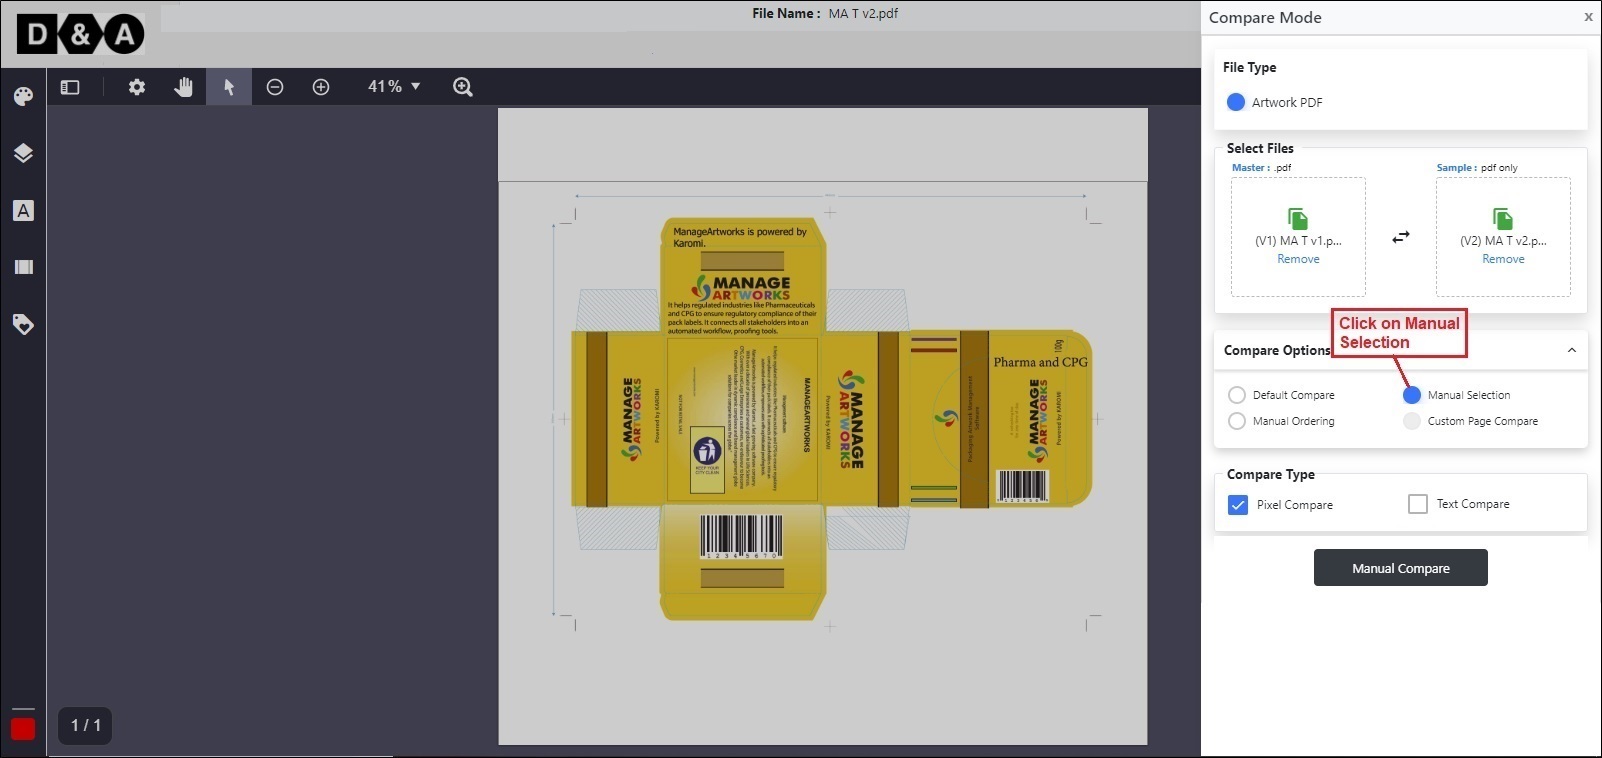
27. Can I select particular areas within the two files to compare?
Yes, you can compare the two file with particular areas.
Click on the Image Compare icon for auto comparision and click on the Manual Comparision tool for manual compare as shown below.
28. How are the comparison results displayed in the viewer?
Comparison results are displayed in the viewer in two modes of comparison:
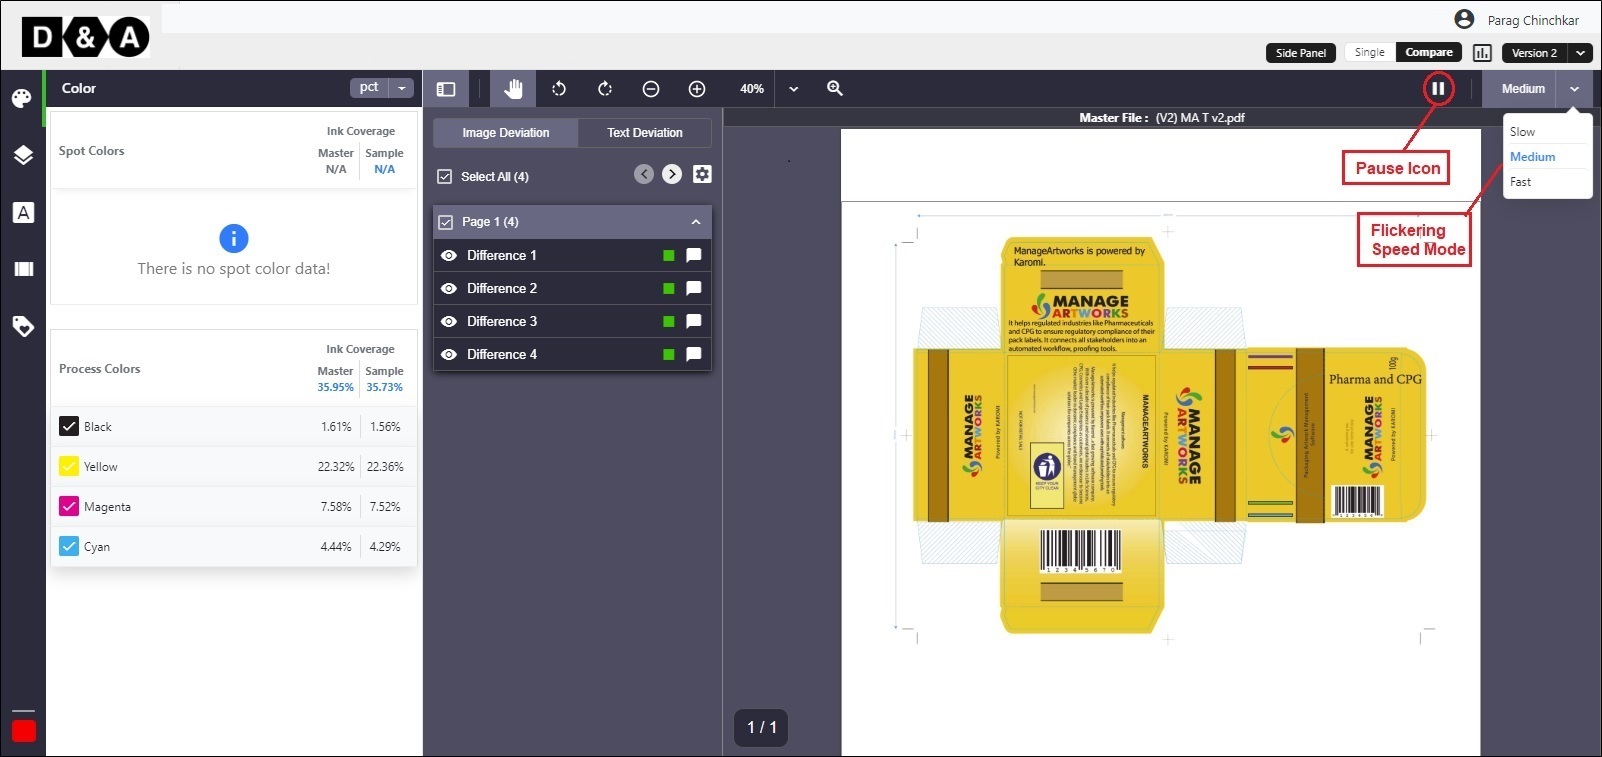
Flicker (Default) - Flicker mode refers to the master and sample getting superimposed over each other in rapid succession which enables the user to spot the differences in the files, this is the default mode for displaying the files after comparison.
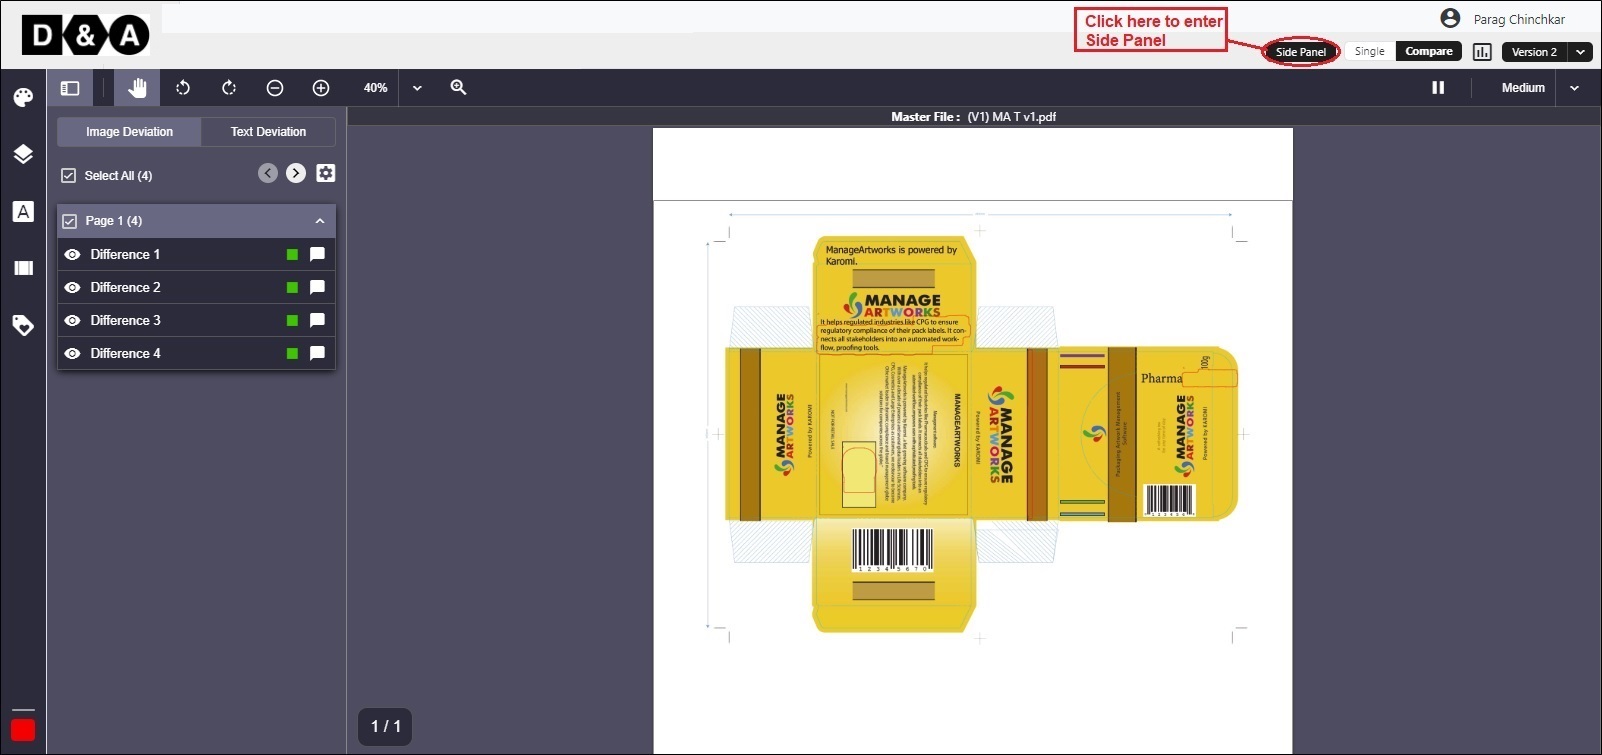 Side By Side - There is a Toggle to Diff Mode button on the toolbar that allows the user to switch between modes.
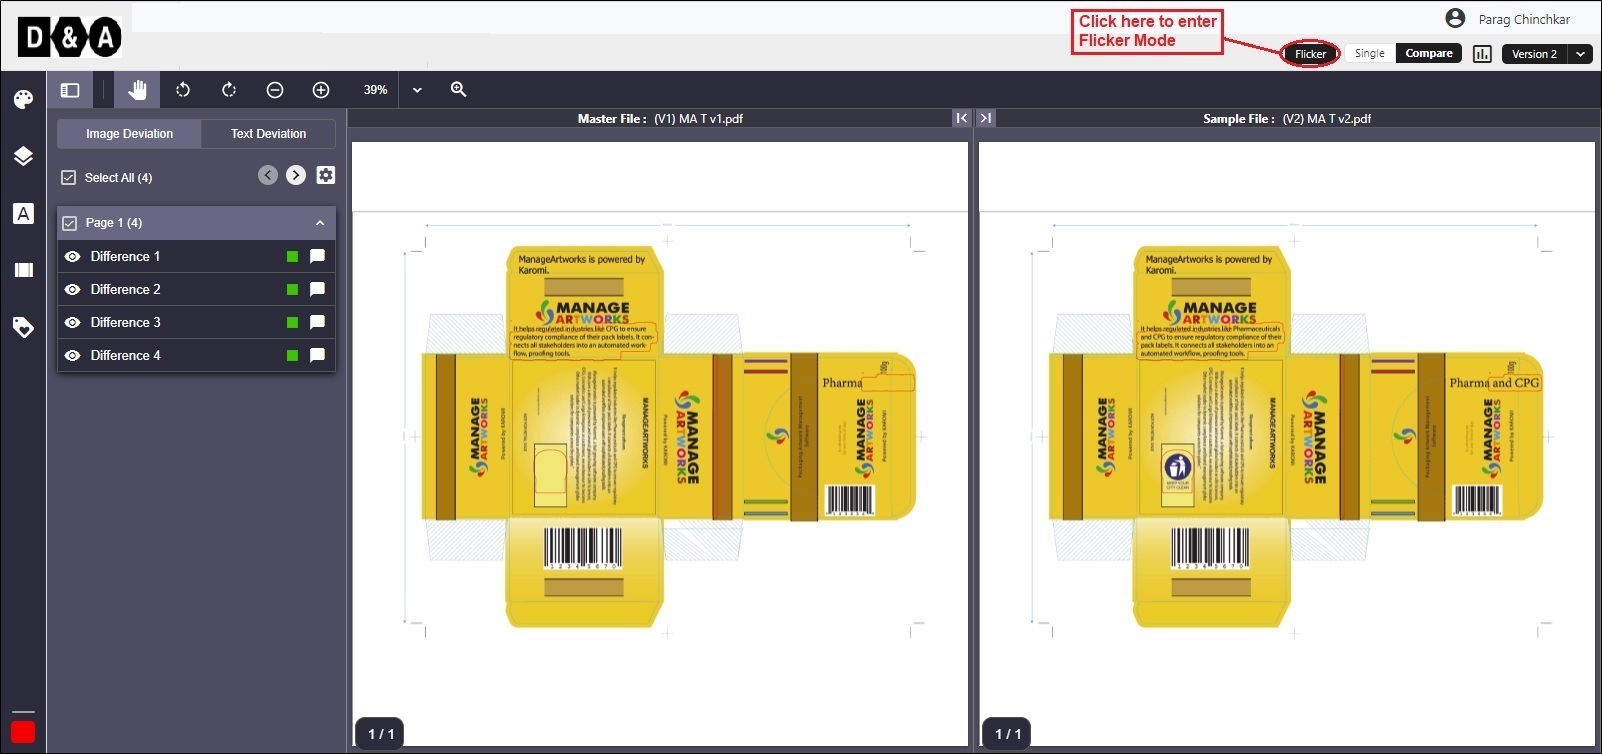
29. How are the differences displayed?
The differences are displayed under the deviation panel tool as differences found icon shown below.
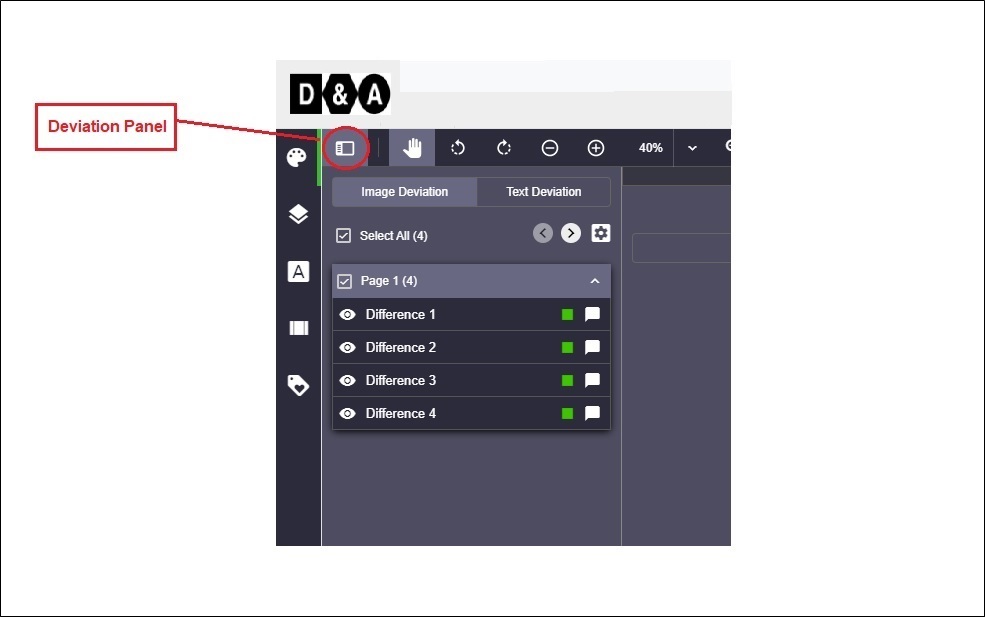 Step to navigate the deviation panel tool as follows.
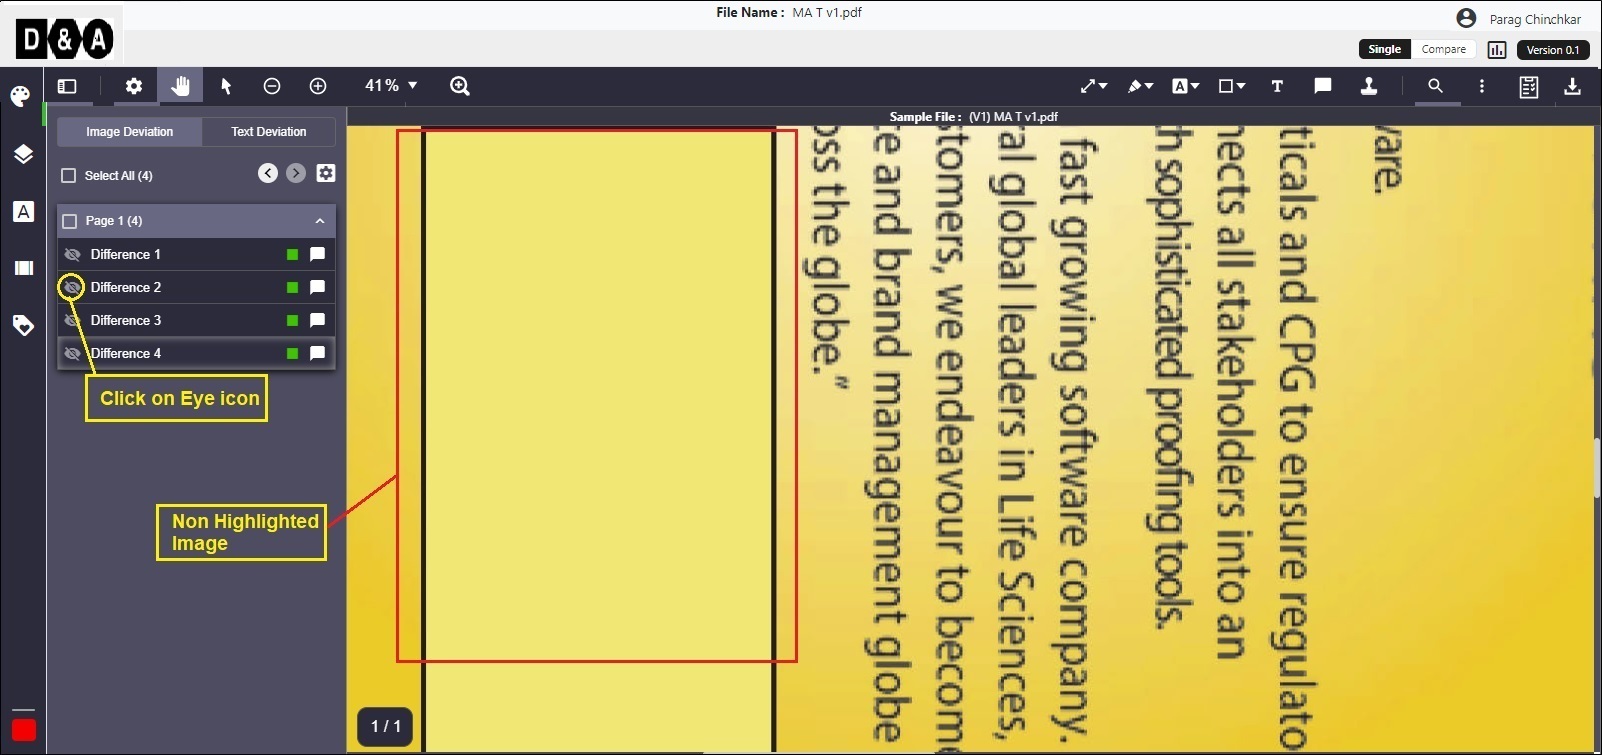
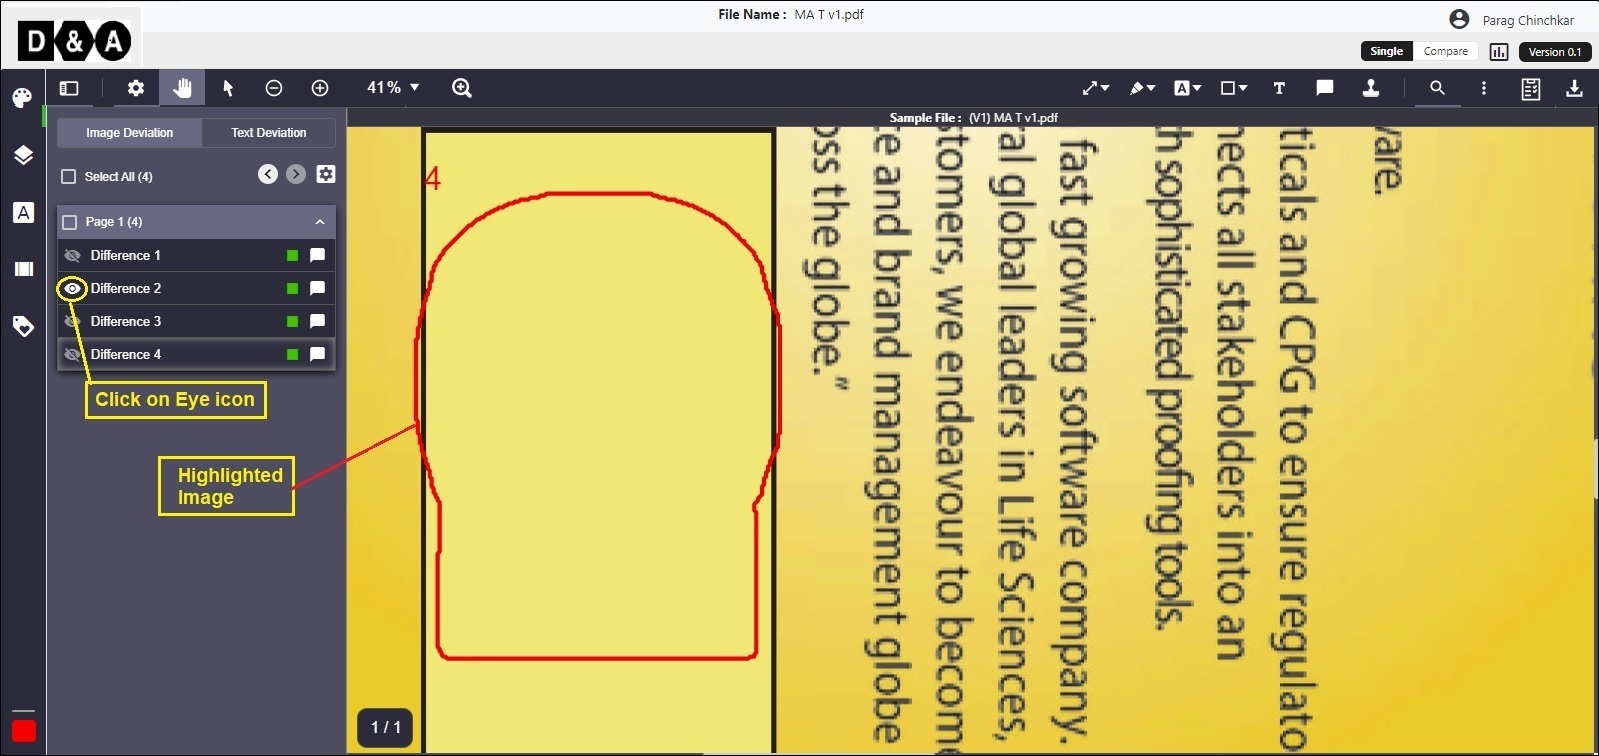
Click on the Image Compare icon -> Click on Deviation panel present at the right side top corner of the viewer -> Click on differences found page and selet the required devation from the page by clicking the eye icon as shown below.
Before Selecting the deviation panel diferrences.
 After Selecting the deviation panel diferrences.
30. Can I pause the flicker?
Yes, you can pause the flicker. Click on the Secondary Tool icon and click on pause icon as shown below.
31. Can I modify the accuracy of the comparison tool to ignore certain minor differences?
Yes, you can modify the accuracy of the camparison tool by enabling the High Sensitive in the deviation panel to ignore certain minor differences.
Click on Deviation Panel icon and Enable High Sensitive Contours. Refer the image shown below.

32. Can I change the colour in which deviations are highlighted?
Yes, you can change the colour of the deviations which are highlighted.
Click on Deviation panel icon ->Click on Deviation setting->Click on the required Deviation Color.

33. How do I ignore a deviation identified by the system?
Click on the Devitaion panel icon->click on Ignore deviation icon as shown below.
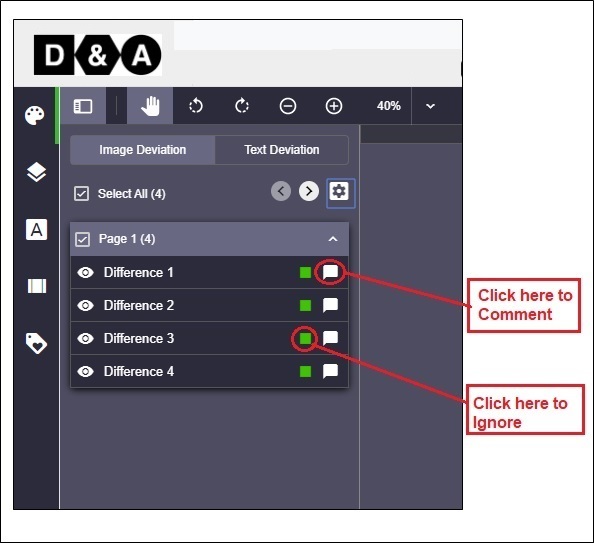
34. How do I provide my comment against a deviation?
Click on the Devitaion panel icon->click on the required deviation and enter Comments for the respective deviation at the bottom.

35. What happens when I click on the deviation?
When you click on the differences found Deviation page, it will navigate to the respective Artwork file were deviation differences are visible.
Before selecting Deviation page2
 After selecting Deviation page2

36. Can I download a report with the differences/deviations?
Yes, you can download a report with the difference/deviations, click on deviation panel icon and click on the Generate Report.

37. What is the format in which I can download the comparison report?
In PDF Format only you can download the comparison report.
38. What are the different sections in the report?
The different sections in the report are mentioned below.
1. Comparison Type 2. Master File 3. Sample File 4. Report Created 5. Perfomed By